Tl;dr
- Stable Diffusion is an exciting new image generation technique that you can easily run locally or using tools such as Google Colab;
- These tools are great for exploration and experimentation but are not appropriate if you want to take it to the next level by building your own applications around Stable Diffusion or run it at scale;
- Metaflow, an open-source machine learning framework developed for data scientist productivity at Netflix and now supported by Outerbounds, allows you to massively parallelize Stable Diffusion for production use cases, producing new images automatically in a highly-available manner.
There are a plethora of emerging machine learning technologies and techniques that allow humans to use computers to generate large amounts of natural language (GPT-3, for example) and images, such as DALL-E. Recently, Stable Diffusion has taken the world by storm because it allows any developer with an internet connection and a laptop (or cell phone!) to use Python to generate images by providing text prompts.
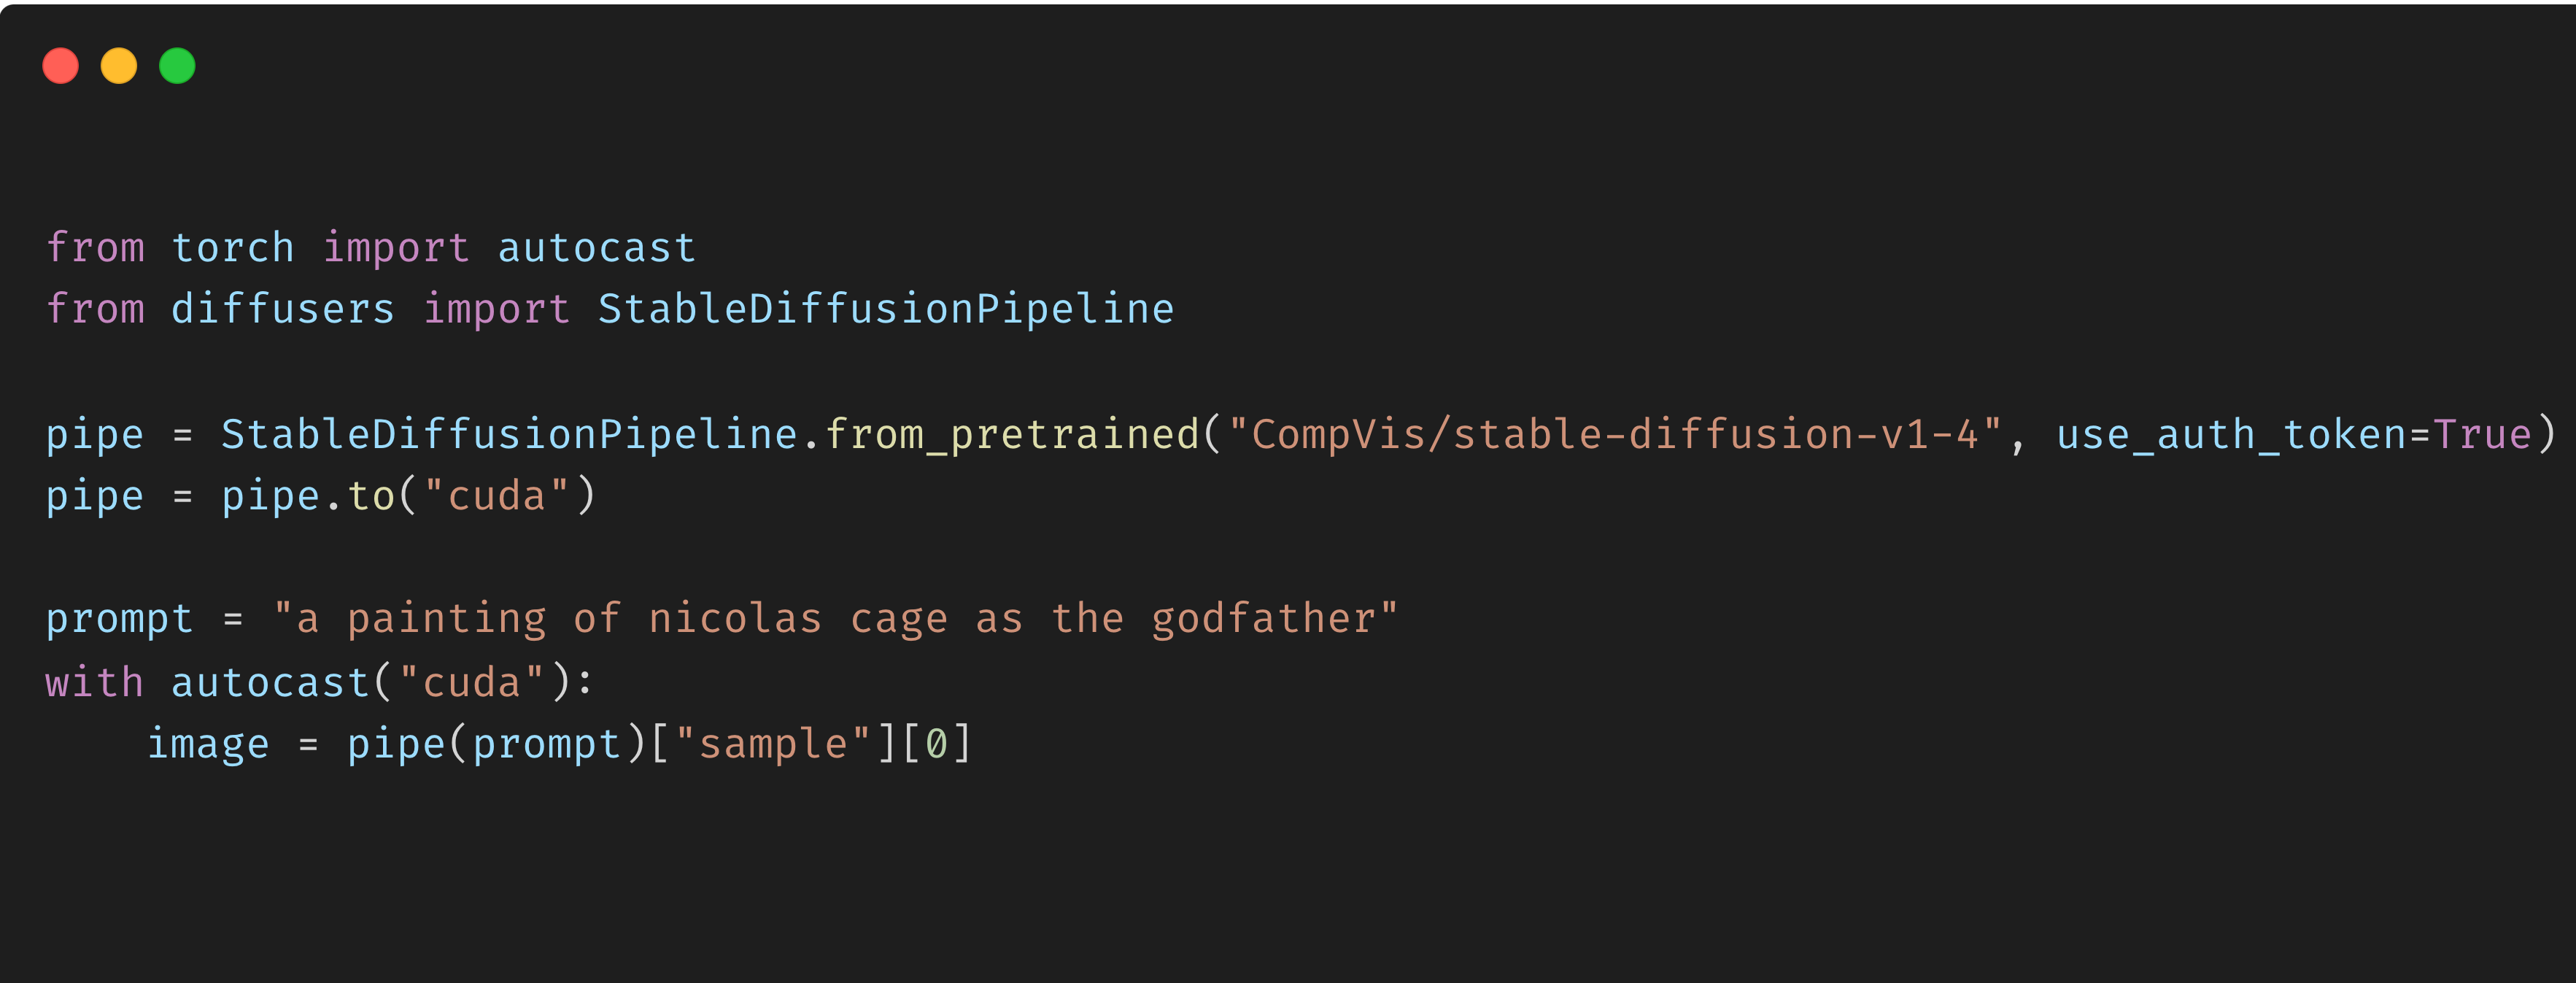
For example, using the Hugging Face library Diffusers, you can generate “a painting of Nicolas Cage as the Godfather (or anybody else, for that matter)” with 7 lines of code.

In this post, we show how to use Metaflow, an open-source machine learning framework developed for data scientist productivity at Netflix and now supported by Outerbounds, to massively parallelize Stable Diffusion for production use cases. Along the way, we demonstrate how Metaflow allows you to use a model like Stable Diffusion as a part of a real product, producing new images automatically in a highly-available manner. The patterns outlined in this post are production-ready and battle-tested with Metaflow at hundreds of companies (such as 23andMe, Realtor.com, CNN, and Netflix, to name a few). You can use these patterns as a building block in your own systems.
We’ll also show how, when generating 1000s of such images at scale, it’s important to be able to track which prompts and model runs are used to generate which images and how Metaflow provides both useful metadata and model/result versioning out of the box to help with this, along with visualization tools. All the code can be found in this repository.
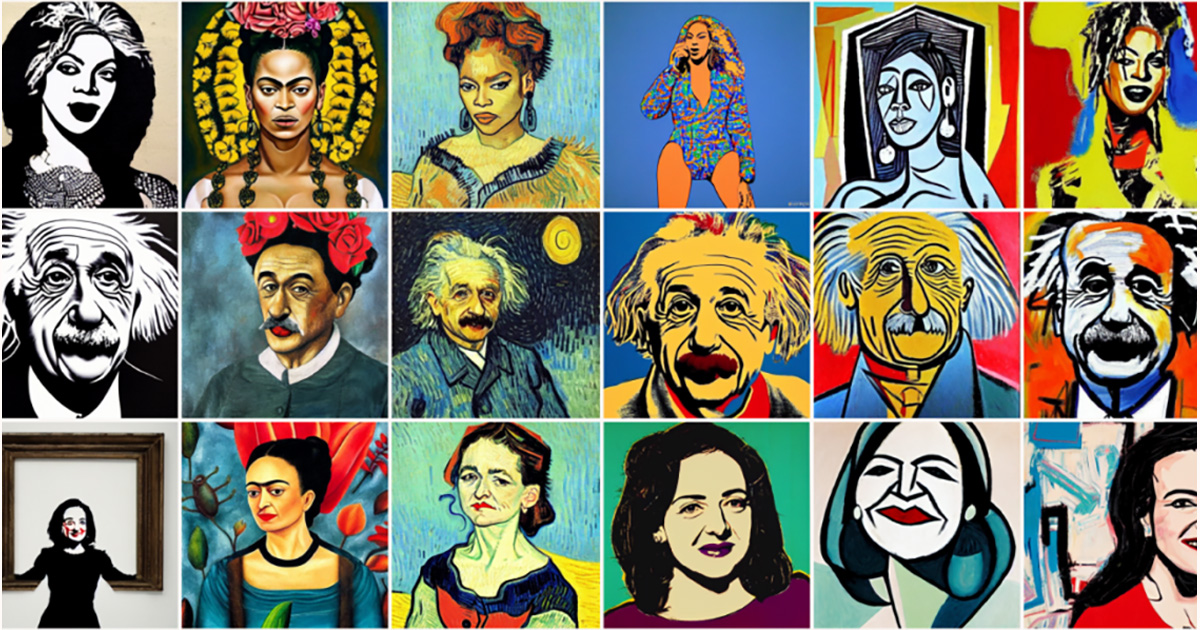
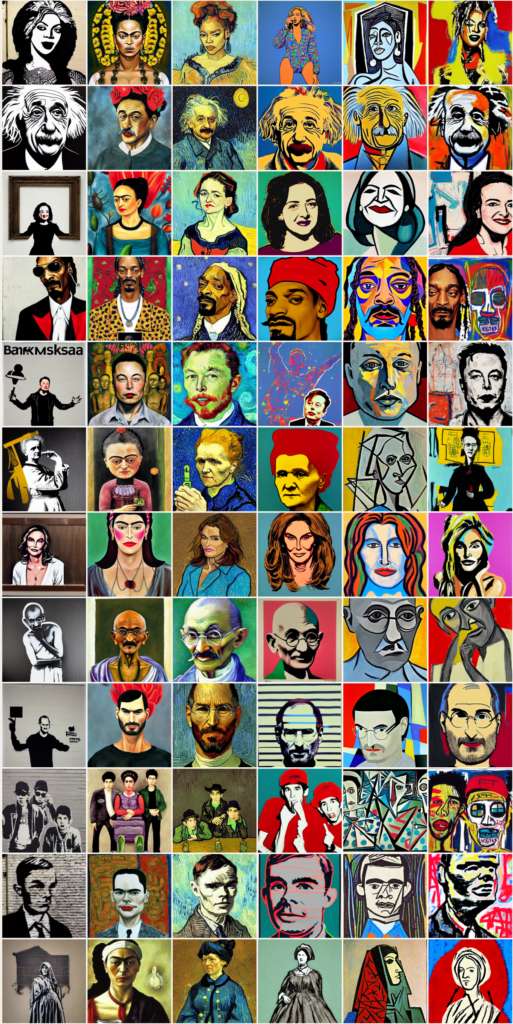
As an illustrative example, we’ll show how you can use Metaflow to rapidly generate images from many prompt-style pairs, as seen below. You’ll only be limited by your access to GPUs that are available in your cloud (e.g. AWS) account: using 6 GPUs concurrently gave us 1680 images in 23 minutes, which is over 12 images per minute per GPU but the number of images you can generate scales with the number of GPUs you use so the cloud’s the limit!
Using Stable Diffusion Locally and on Colab and their limitations
There are several ways you can use Stable Diffusion via the Hugging Face Diffusers library. Two of the most straightforward are:
- If you have GPUs on your laptop, you can use your local system to follow the instructions in this Github repository README;
- Using Google Colab to leverage cloud-based GPUs for free with notebooks such as this.
The 7 lines of code used to generate the “painting of Nicolas Cage as the Godfather” above in a Colab notebook were:
These two methods are both wonderful approaches to getting up and running and they allow you to generate images, but they are relatively slow. For example, with Colab, you’re rate-limited by Google’s free GPU provisioning to around 3 images per minute. This then begs the question: if you want to scale to use more GPUs, how do you do that trivially? On top of this, Colab notebooks and local computation are great for experimentation and exploration, but if you want to embed your Stable Diffusion model in a larger application, it isn’t clear how to use these tools to do so.
Moreover, when scaling to generate potentially orders of magnitude more images, versioning your models, runs, and images become increasingly important. This is not to cast shade on your local workstation or on Colab notebooks: they were never intended to achieve these goals and they do their jobs very well!
But the question remains: how can we massively scale our Stable Diffusion image generation, version our models and images, and create a machine learning workflow that can be embedded in larger production applications? Metaflow to the rescue!
Using Metaflow to Massively Parallelize Image Generation with Stable Diffusion
Metaflow allows us to solve these challenges by providing an API that affords:
- Massive parallelization via branching,
- Versioning,
- Production orchestration of data science and machine learning workflows, and
- Visualization.
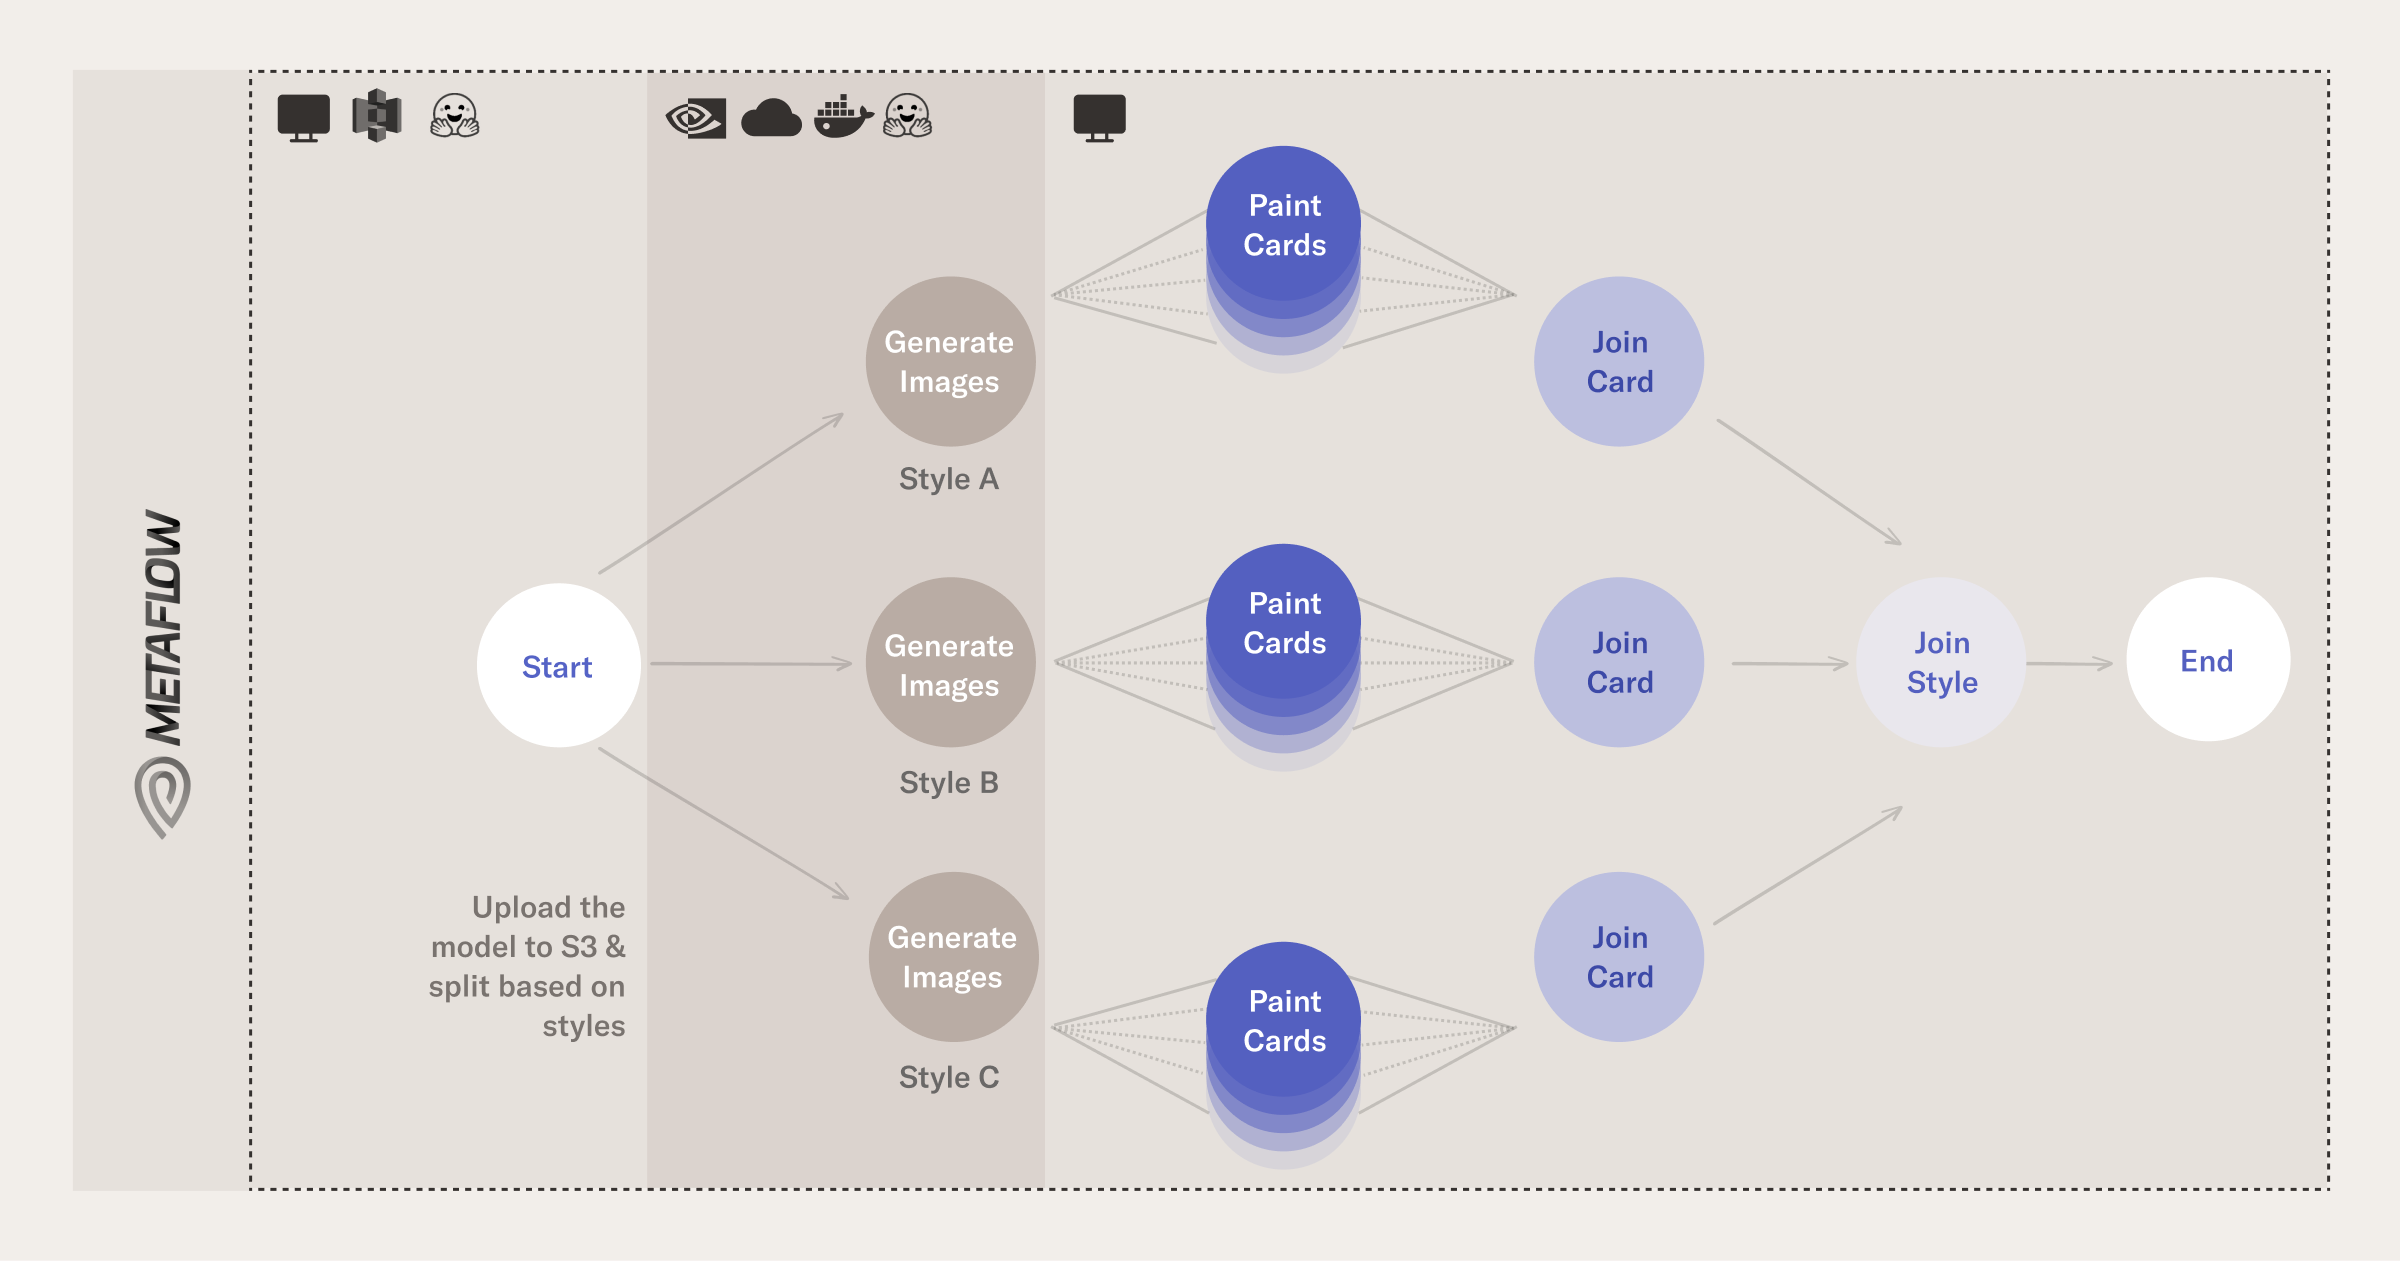
The Metaflow API allows you to develop, test, and deploy machine learning workflows using the increasingly common abstraction of directed acyclic graphs (DAGs), in which you define your workflow as a set of steps: the basic idea here is that, when it comes to generating images using Stable Diffusion, you have a branching workflow, in which
- each branch is executed on different GPUs and
- the branches are brought together in a join step.
As an example, let’s say that we wanted to generate a large number of subject-style pairs: given a large number of subjects, it would make sense to parallelize the computation over the prompts. You can see how such branching works in the following schematic of a flow:
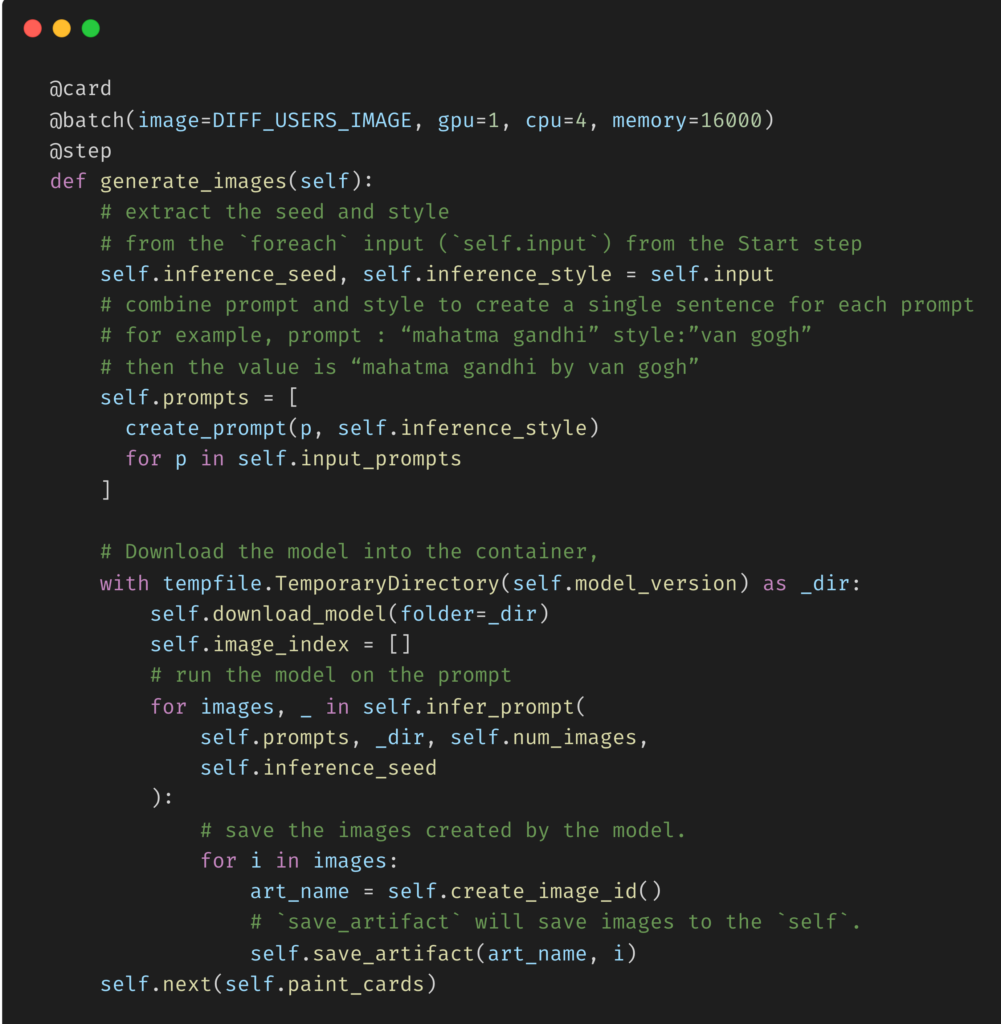
The key elements of the generate_images step are as follows (you can see the whole step in the repository here):
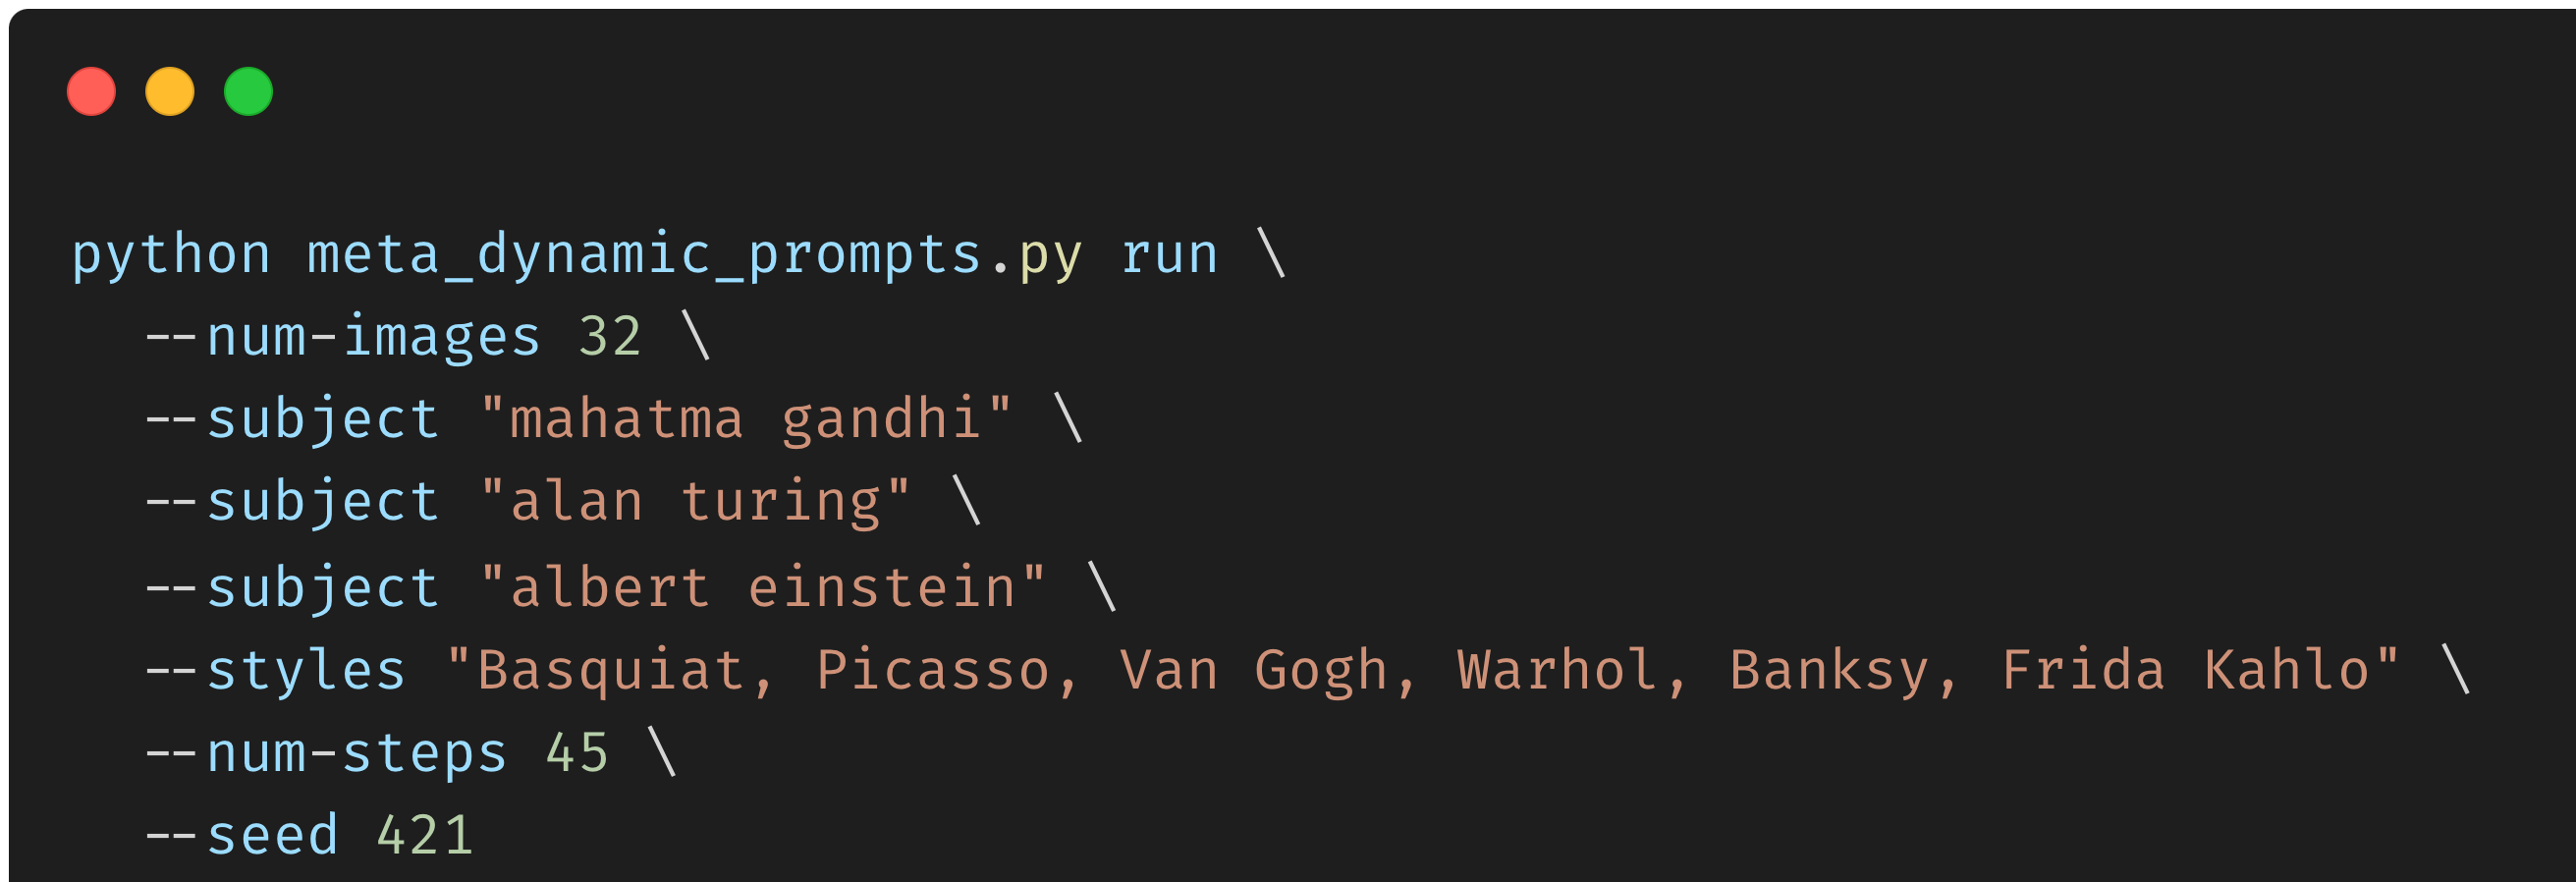
To understand what’s happening in this code, first note that, when executing the Metaflow flow from the command line, the user has included the subjects and styles. For example:
The styles, subjects, and seeds (for reproducibility) are stored as a special type of Metaflow object called Parameters, which we can access throughout our flow using self.styles, self.subjects, and self.seed, respectively. More generally, instance variables such as self.X can be used in any flow step to create and access objects that can be passed between steps. For example, in our start step, we pack our random seeds and styles into the instance variable self.style_rand_seeds as follows:

generate_images step, what we are doing is
- extracting the seed and style that were passed from the
startstep in the instance variableself.input(the reason it’sself.inputis due the branching from thestart: for more technical details, check out Metaflow’sforeach), - combining subject and style to create a single sentence for each prompt, such as subject “mahatma gandhi” and style ”van gogh” create the prompt “mahatma gandhi by van gogh”, and
- downloading the model into the container, run the model on the prompt and save the images created by the model.
Note that, in order to send compute to the cloud, all we needed to do is add the @batch decorator to the step generate_images. This affordance of Metaflow allows data scientists to rapidly switch between prototyping code and models and sending them to production, which closes the iteration loop between prototyping and productionizing models. In this case, we’re using AWS batch but you can use whichever cloud provider suits your organizational needs best.
With respect to the entire flow, the devil is in the (computational) detail so let’s now have a look at what is happening in our Metaflow flow more generally, noting that we download the Stable Diffusion model from Hugging Face (HF) to our local workstation before running the flow.
start: [Local execution] We cache the HF model to a common data source (in our case, S3). Once cached, parallelly run the next steps based on the number of subjects/images;generate_images: [Remote execution] For each style, we run a docker container on a unique GPU that creates images for the subject+style combination;paint_cards: [Local Execution] For each style, we split the images generated into batches and generate visualizations with Metaflow cards for each batch;join_cards: [Local Execution] We join the parallelized branches for the cards we generate;join_styles: [Local Execution] We join the parallelized branches for all styles;end: [Local Execution]: END step.
After the paint_cards step has finished execution, the user can visit the Metaflow UI to inspect the images created by the model. The user can monitor the status of different tasks and their timelines:
You can also explore results in the Metaflow UI yourself and see the images we generated when we executed the code.
Once the flow completes running, the user can use a Jupyter notebook to search and filter the images based on prompts and/or styles (we’ve provided such a notebook in the companion repository). As Metaflow versions all artifacts from different runs, the user can compare and contrast the results from multiple runs. This is key when scaling to generate 1,000s, if not 10s of 1000s, of images as versioning your models, runs, and images become increasingly important:
Conclusion
Stable Diffusion is a new and popular way of generating images from text prompts. In this post, we’ve seen how there are several ways to produce images using Stable Diffusion, such as Colab notebooks, that are great for exploration and experimentation, but that these do have limitations and that using Metaflow has the following affordances:
- Parallelism, in that you can scale out your machine learning workflows to any cloud;
- All MLOps building blocks are wrapped in a single convenient Pythonic interface (such as versioning, experiment tracking, workflows, and so on);
- Most importantly, you can actually build a production-grade, highly-available, SLA-satisfying system or application using these building blocks. Hundreds of companies have done it before using Metaflow, so the solution is battle-hardened too.
If these topics are of interest, you can come chat with us on our community slack here.


